


GIT Tutorial for Beginners
Introduction
Git is a tool which stores various kinds of files and projects in an effective manner. Git acts as a medium of coordination between people living in different parts of the world and working on the same project. To ensure that the Git works effectively various commands are used which are collectively known as Git Commands.
What is GIT?
Git is a repository where all program files and projects are stored. It is a version control system that keeps a record of the changes made in files or projects so that a particular version can be considered based on the changes made. This ensures smoother collaboration among various stakeholders involved in the project and also making the collaboration process easier for very large projects. Through Git, team members involved in a project can keep a record of each other’s work progress. There are two repositories present in GIT which are as follows:
Local Repository: Local repository is a repository which is present in our computer systems. In the local repository all the changes in the project files and codes are made from our local system by an individual person even in offline mode.
Remote Repository: Remote Repository is the server repository which is present in version control tools like GitHub. In the remote repository all the changes made in the project files as well as code can be accessed by all the team members involved in the project.
Git Bash
Git Bash is a tool for Microsoft windows operating system which provides a Git command line interface(CLI). Through git bash users can run various git commands to move the project files from local system to remote repository thus making it easier for developers to manage their projects easily.
Steps to download and install Git Bash
The various steps involved in downloading and installing git bash are as follows:
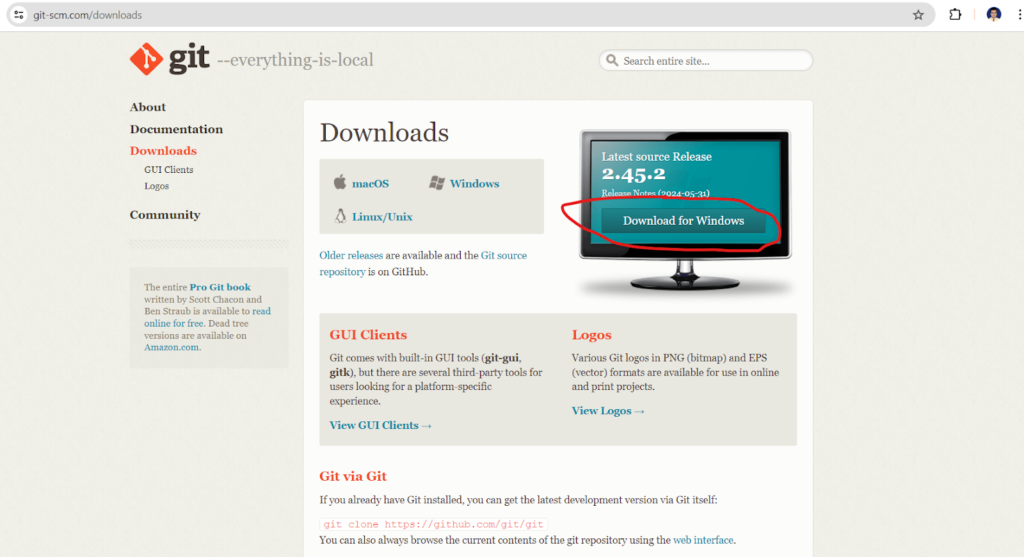
- Launch the below page and click on”Download for Windows” button.
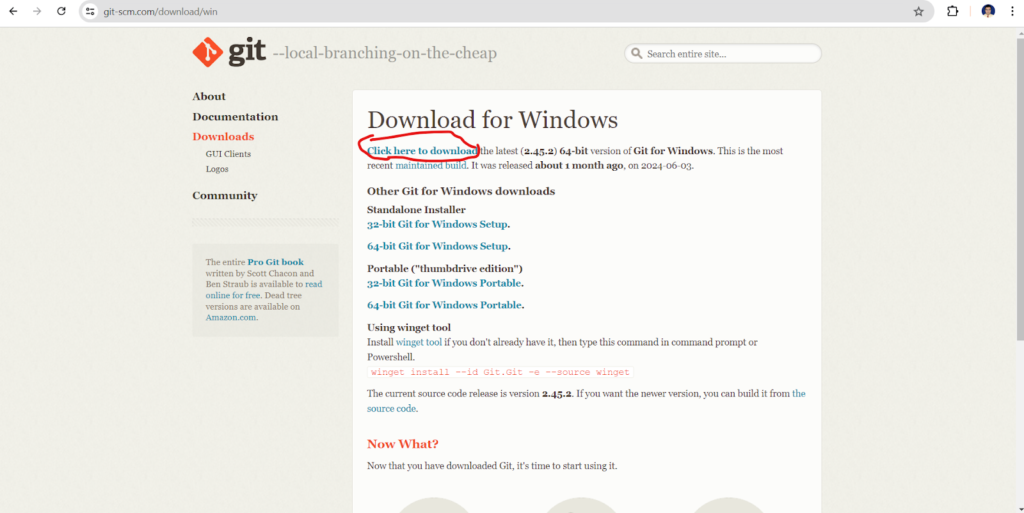
2. Click on “Click here to download” link.
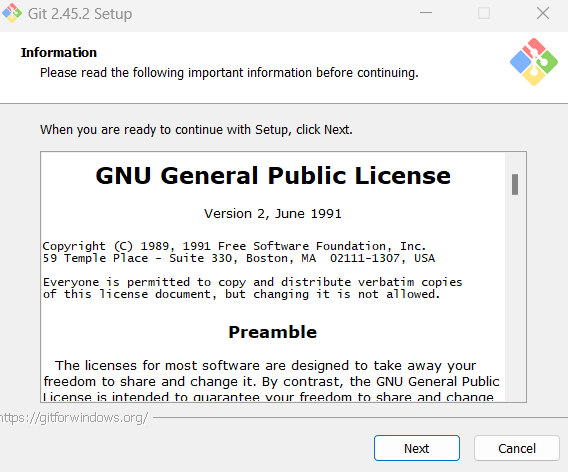
3. Go to the location where git.exe file is downloaded.Click on that file. The Git Setup dialog box will appear as shown below. In the below dialog box click on “Next” button.
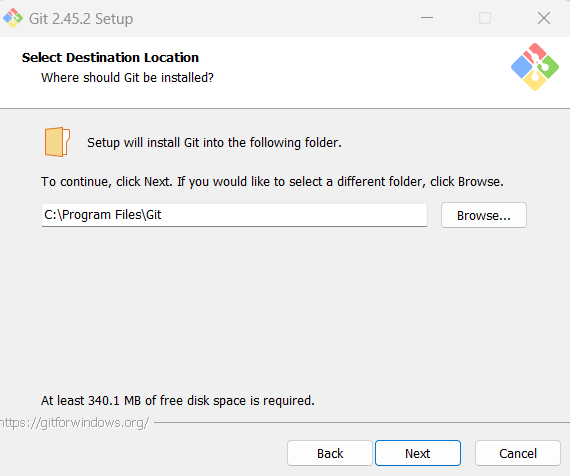
4. Select the destination location by clicking on ”Browse” button. Then click on “Next” button.
5. Select any component or components from list of components. After that click on “Next” button.

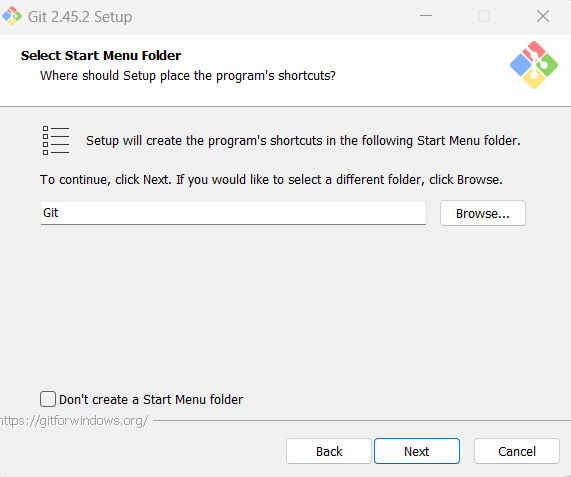
6. In the below dialogbox click on “Next” button. We can also enable the checkbox “Don’t create a start menu folder” if we do not want to create a folder at Start menu before clicking on “Next” button.
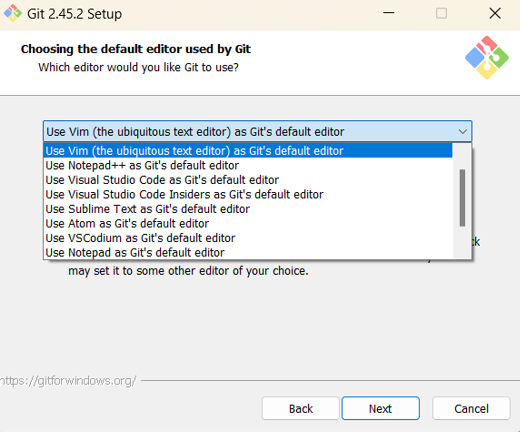
7. In the below dialog box it is asking to choose the default editor. Select any git editor from the list of available options in the dropdown. In this case Vim editor is selected. After that click on “Next” button.
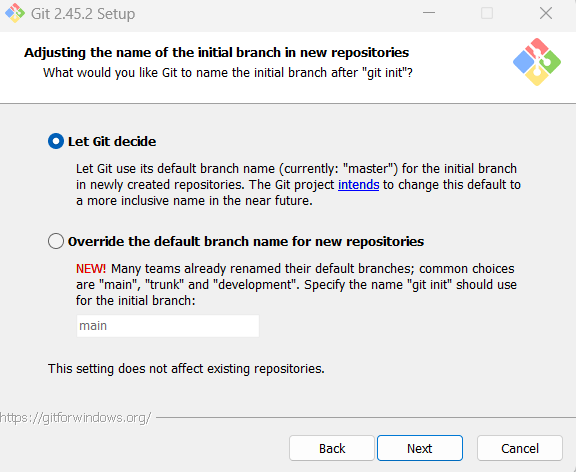
8. In the below git setup dialog box it is asking to adjust the name of the initial branch in new repositories. Chose any one of options mentioned besides radio button and click on “Next” button. In this case “Let Git decide” is selected.
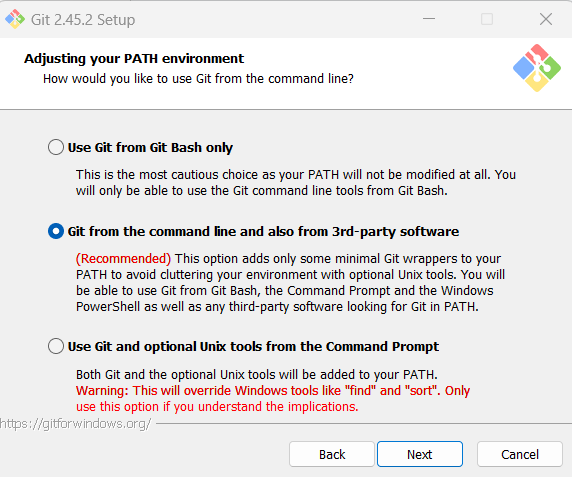
- In the below dialog box select the path environment from the list of path environment options present besides radio button and Click on “Next” button. In this case 2nd option is selected as shown below.
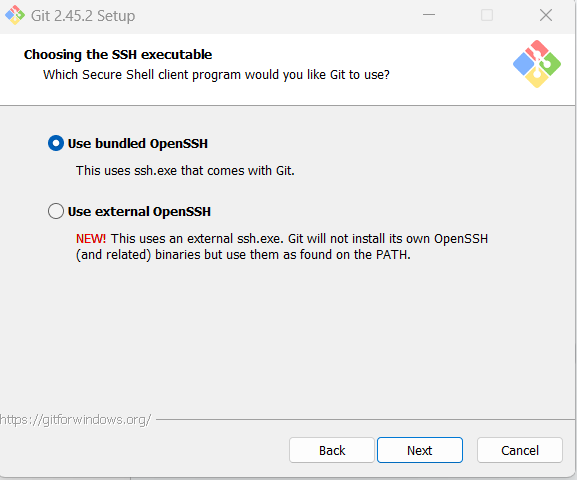
- Choose any of Secured Shell Client(SSC) program from list of options and click on “Next” button. Here first option is selected.
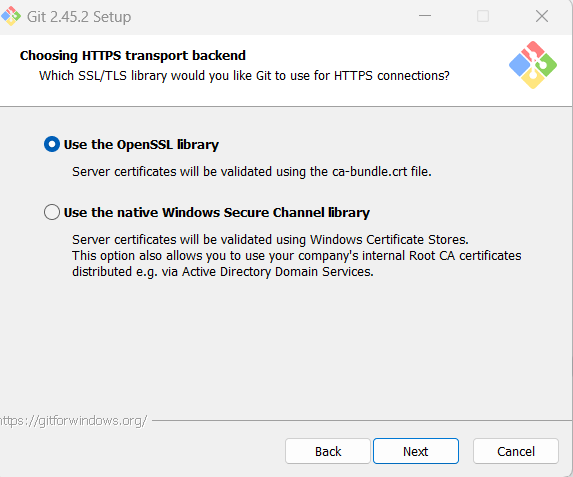
- Choose any of SSL/TLS library for HTTPS connections and click on”Next” button. Here first option is selected.
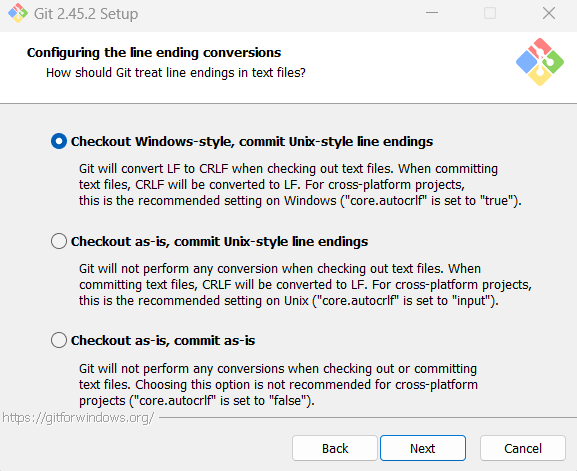
- Choose any of available options to configure line ending conversions and click on”Next” buton. Here first option is selected.
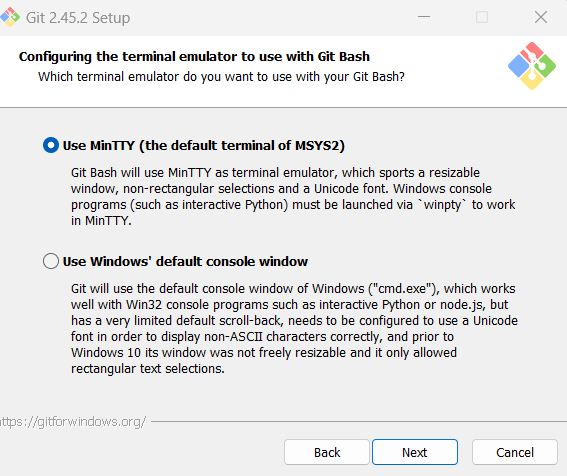
- Configure Terminal emulator by selecting any option and click on “Next” button. Here first option is selected.
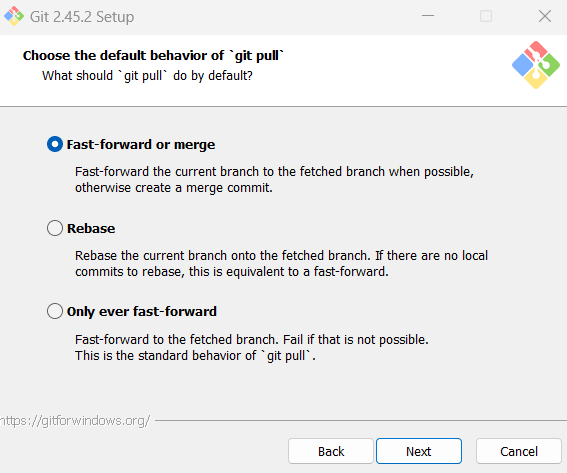
- Choose default behaviour of “git pull” from list of available options and click on “Next” button. In this case first option is selected.
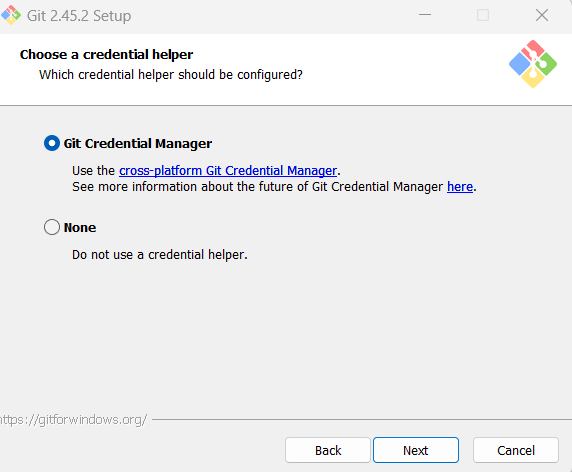
- Choose a git credential helper for configuration and click on “Next” button. Here first option is selected.
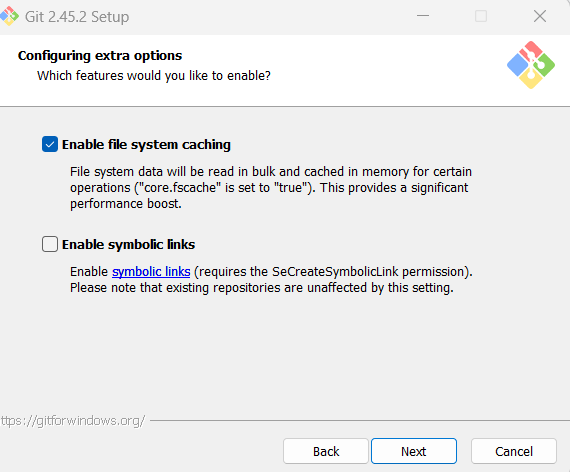
- Enable any of the extra feature and click on “Next” button. Here file system caching is enabled.
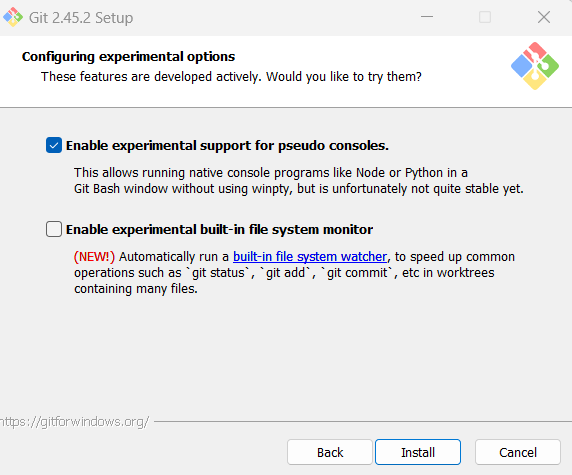
- Configure any of experimental options and click on “Install” button. Here first option is configured.
- Git bash installation process has started as shown below.

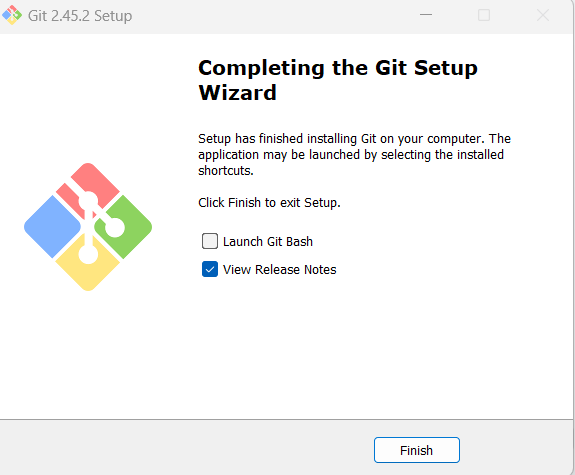
- After installation process is completed, we can either launch git bush or view release notes or simply both check boxes can be selected. If we do not want to launch git bash or view release notes we can disable both check boxes simultaneously. After that click on “Finish” button thus completing the git bash installation.
GIT Commands
There are various commands used in GIT for its proper functioning which are as follows.
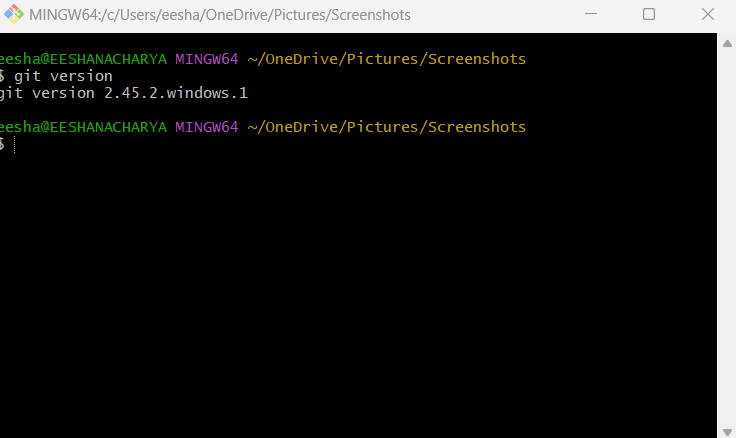
git version
This command is used to check the version of gitbash installed in local machine.
Syntax
The syntax of git version is : git version
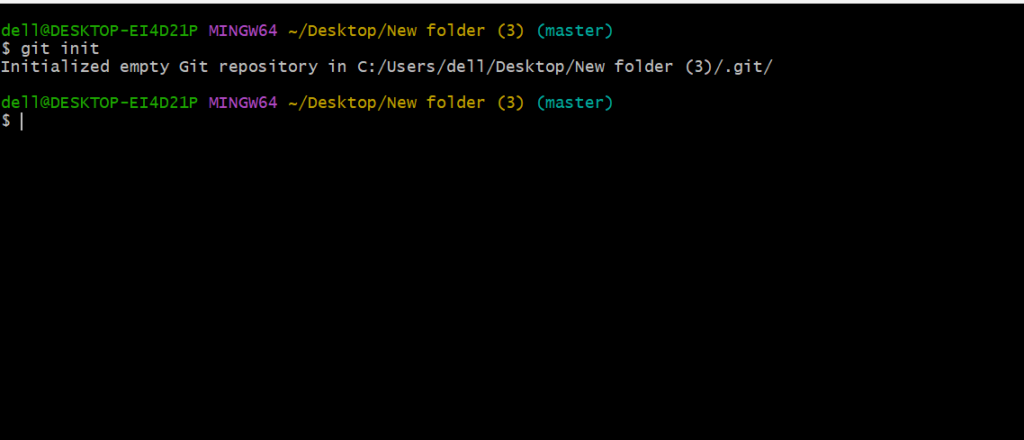
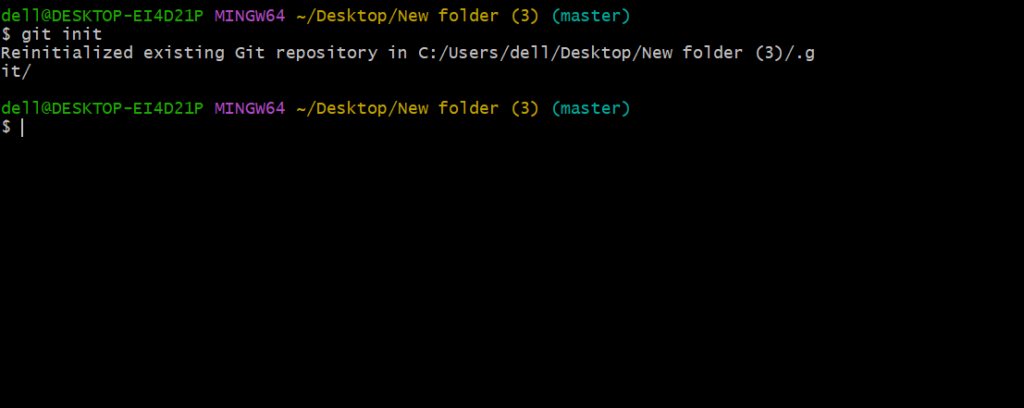
git init
git init is used to initialise an empty git repository as well as to re initialize the already existing git repository. After using gitint command a folder named as .git will be created and inside that folder there will be lot of files and folders.
Syntax
The syntax of gitinit is: git init
git clone
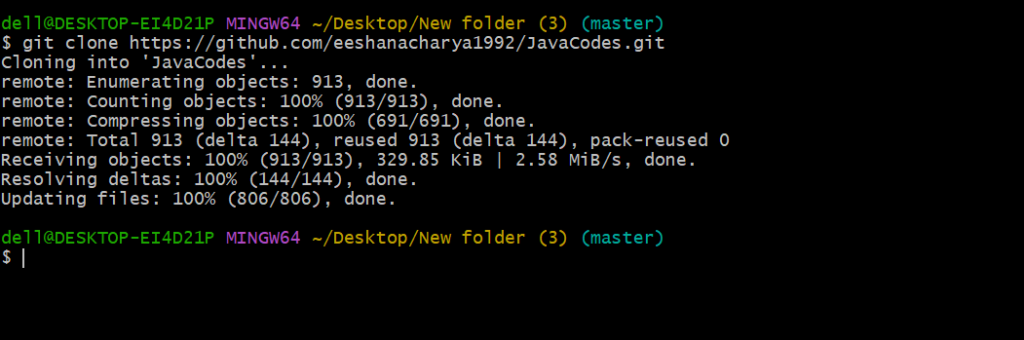
‘git clone’ is a git command that creates a copy of the new or existing repository present in the remote or in the webpage of git into our local system. If an empty repository is cloned it will display a warning message as “You appear to have cloned an empty repository”.If the repository which contains all files and codes is cloned then it will display the updates of the repo files cloned from remote to local system.
Syntax
The syntax for git clone is : git clone repository link.git

git status
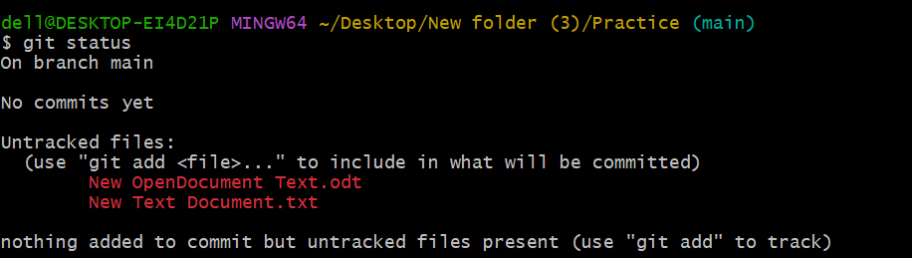
git status is used to check the present status of the repository which has been cloned into the local system. If the contents of the repository are not committed through git commit it will be displayed in red color alongwith the extension but if the contents of the repository are committed using git commit it will display a message as “nothing to commit”.
Syntax
The syntax for git status is : git status
Git add
git add is used to add any file of the repository present in local system and it is done before the process the of sending the file or date from local system to remote.
Syntax
- In case of moving all the files of repository the syntax we use is: git add .
- In case of moving a particular file of repository the syntax we use is: git add filename.extension


git commit
git commit is used to keep track of changes made to the project in the local repository. This command is written after add command and before push command. The message displayed besides commit command signifies what type of changes are made to the project. If there is a file or group of files and we are using commit command then it will display the number of files changed, the number of insertions and deletions.After doing git commit to a file if no other files are added through git add command then it will display message as “nothing to commit, working tree clean”.
Syntax: git commit -m “any message”


git push
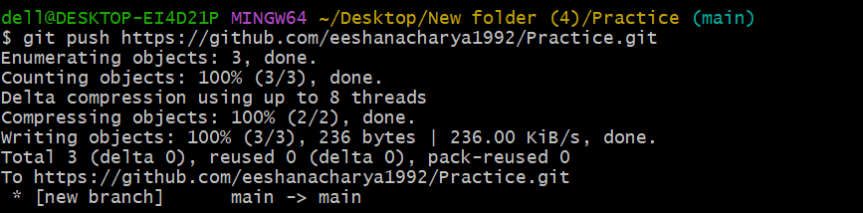
git push command is used to send a file or a piece of code from a local repository to the remote repository. After doing a git commit which means doing modifications in files of the local repository we use the git push command to send those files to the remote repository so that the other team members can access the file. After git push is done it will display the percentage of counting and enumerating objects done,number of bytes consumed for writing objects etc. If we try to use the git push command for the same file it will display as “everything up to date”.
Syntax: git push repositoryurl.git

How to add a new file in git remote repository
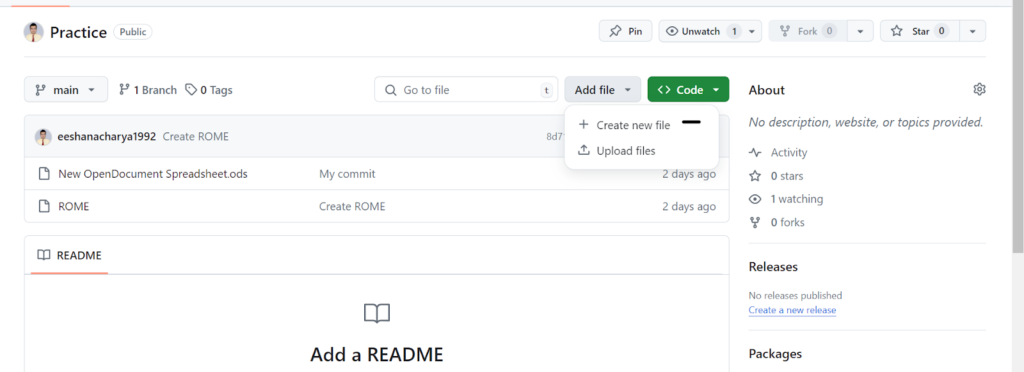
- Open the remote repository and click on “Add file” button.
2. Click on “Create a new file”.
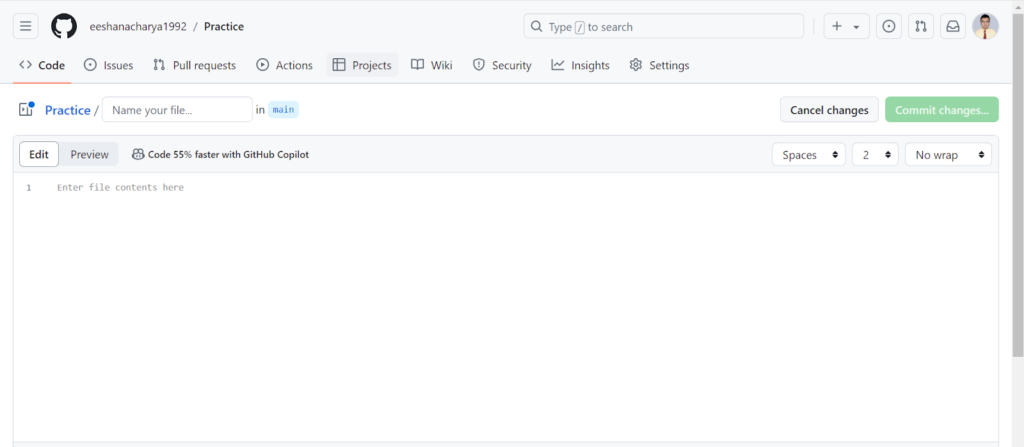
3. Give a name to the file in “Name your file” text field and add some contents to that file under “Enter file contents here” field. Then click on “Commit changes” button or if we do not want to create a new file then click on “Cancel changes” button.
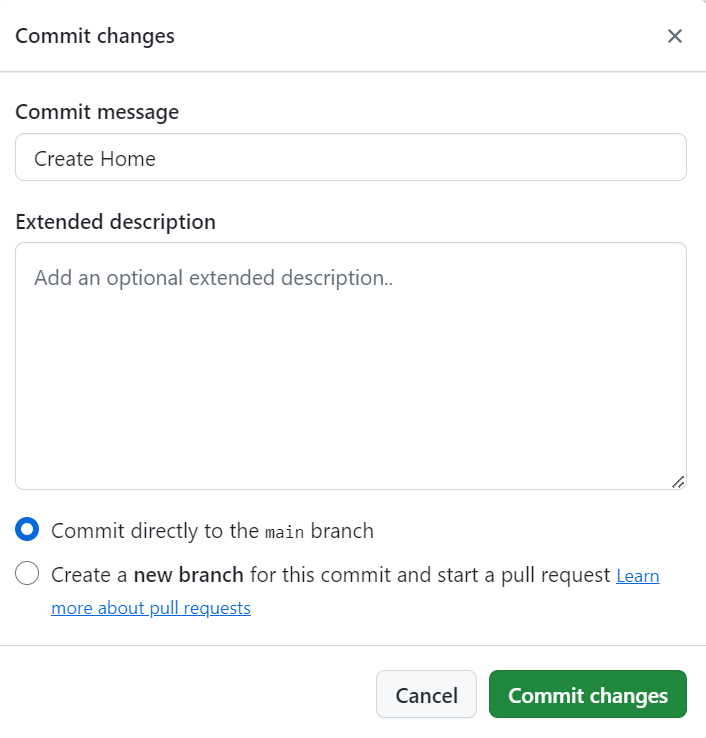
4. Write a message under “Commit Message” field and if required give more description under “Extended description” field. Then chose either “Commit directly to the main branch” radio button or “Create a new branch for this commit and start a pull request” radio button. Then click on “Commit changes” button
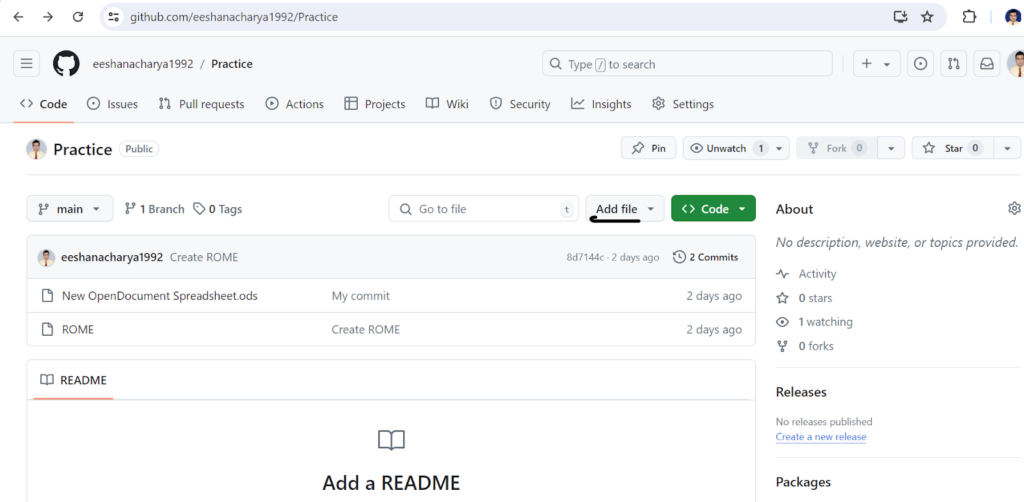
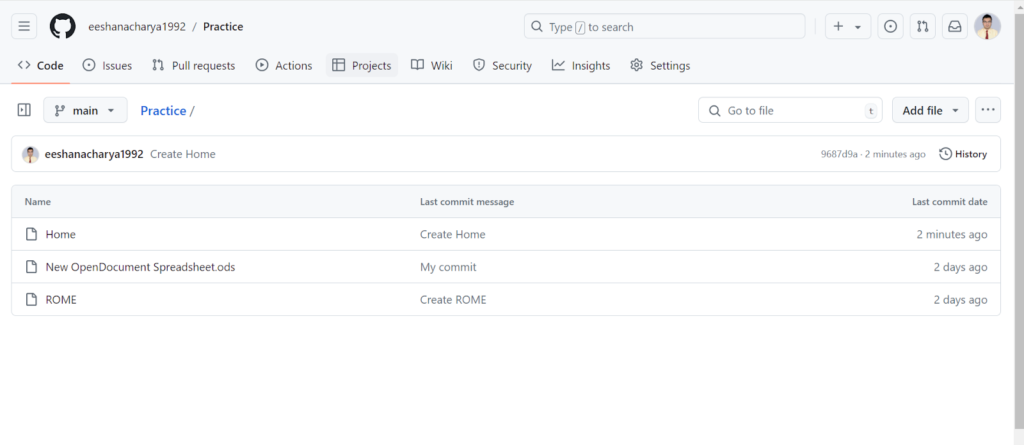
5. A file is created in the remote repository as shown below and it is ready to be pulled into local repository using pull command of git.
git pull
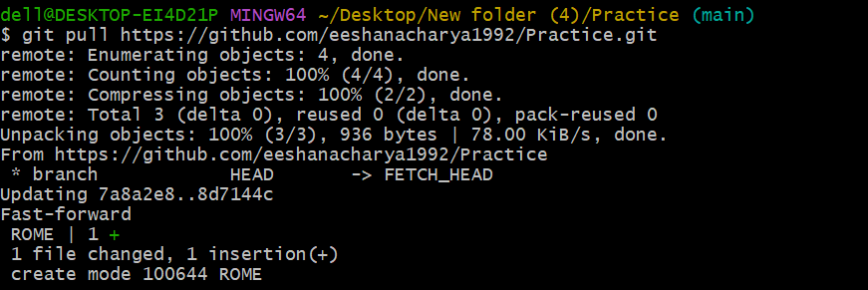
git pull command is used to send a file or piece of code from the remote repository to the local repository. Remote team members make some code modifications in the remote repository and send those file to the local system using git pull. After git pull is done it will display the percentage of counting and enumerating objects done,number of bytes consumed for unpacking objects etc. If we try to use git pull command for the same file it will display as “everything up to date”.
Syntax: The syntax for git pull is : git pull repositoryurl.git

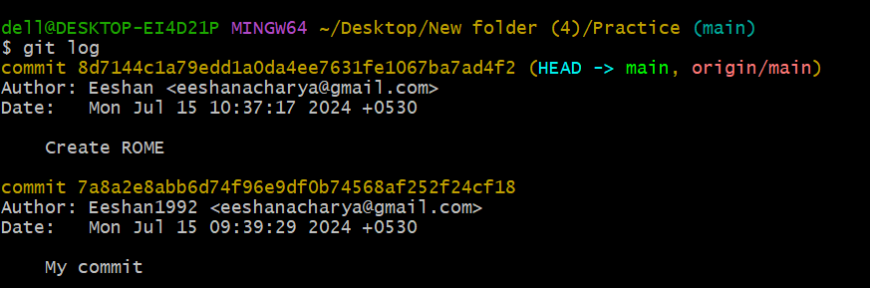
git log
git log is a command which gives the commit history made in a particular branch. It displays the commit messages which were created using commit command for each of the file sent from the local system to a particular branch of the remote repository. It helps developers to keep track of number of files sent from local system to remote repository.
How to create new branches in git remote repository?
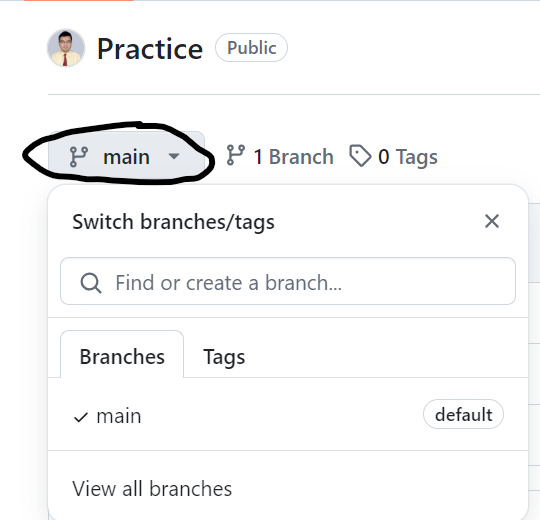
- Click on the button mentioned in black circle and select view all branches.
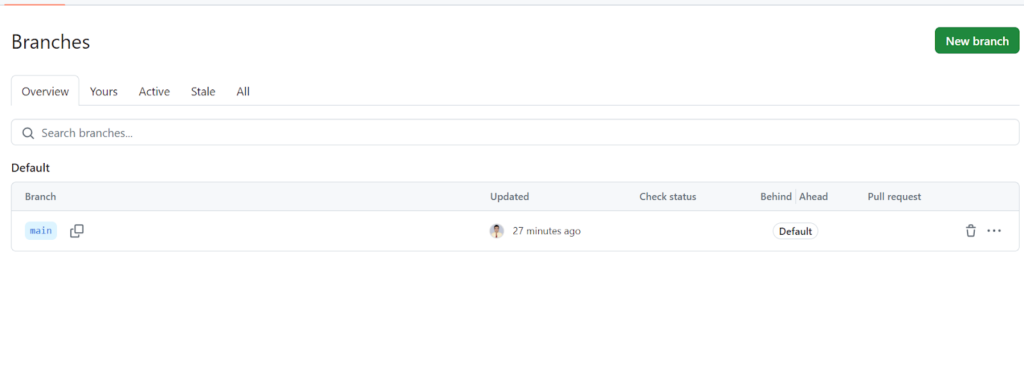
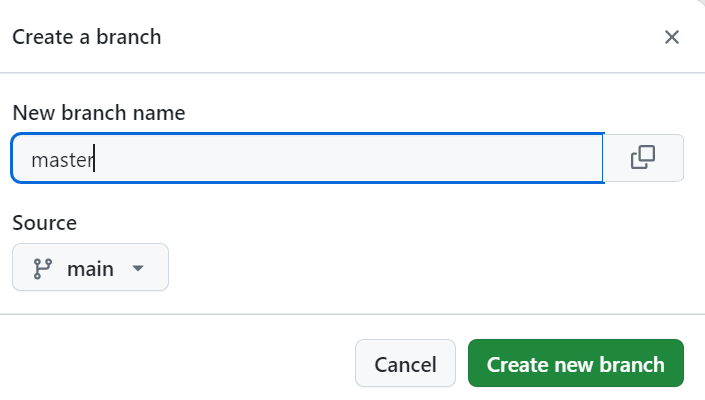
2. Click on “New branch” button.
3. Give a name to the branch say ”master” and click on “Create new branch” button.
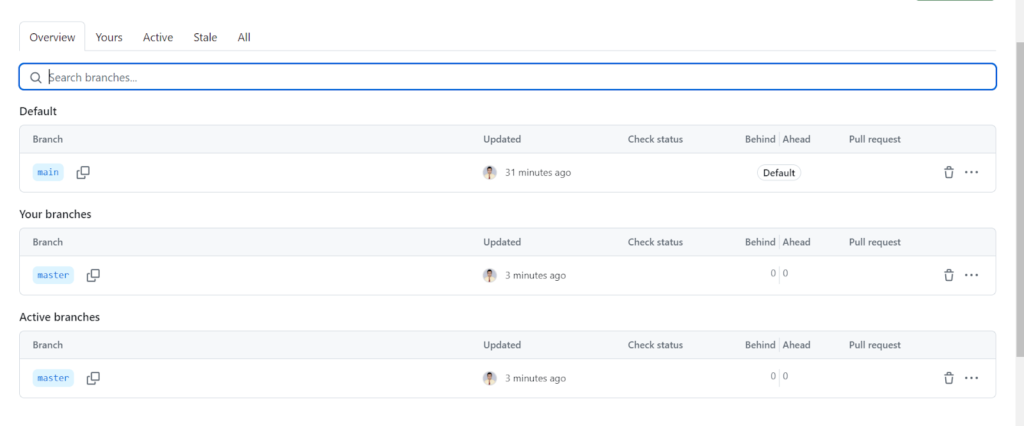
4. The new branch is created and below screenshot shows the list of all branches present in the repository including the recently created branch and the currenlty active branch.
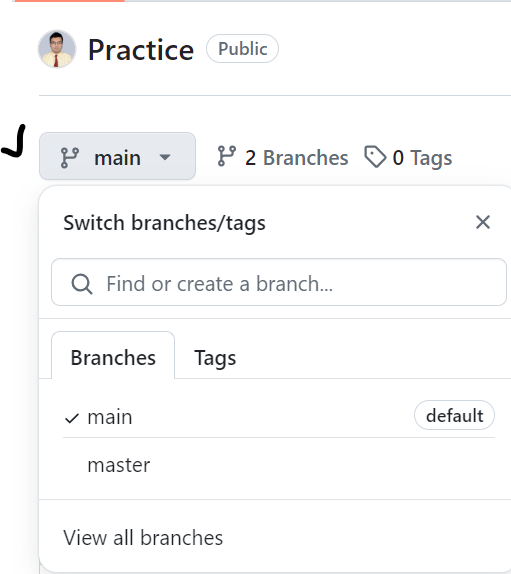
5. The new “master” branch can also be viewed as shown below by clicking on the button which is marked in black. The below picture also shows number of branches present in the git remote repository.
git checkout
git checkout is used to change from one branch to another branch in the local repository.
Syntax:
The syntax for git checkout is: git checkout branchname

git branch
git branch is used to display all the branches present in the remote git repository into the local system which is called git bash. It is also used to create new branch in local repository as well as delete a branch present in the local repository. There are thre types of git branch commands git branch -a, git branch -d and git branch <branchname>
git branch -a
This command is used to display the list of branches present in remote repository into our local system
Syntax:
The syntax for git branch -a is : git branch -a

In the above screenshot the master branch is in green colour which indicates that master branch is active

In the above screenshot the main branch is in green colour which indicates that main branch is active
git branch <branch name>
This command is used to create a new branch in our local system.
Syntax:
The syntax of git branch <branch name> is : git branch branchname

git branch -d
This command is used to delete any branch present in the local system.
Syntax:
The syntax for git branch -d is: git branch -d branchname

Conclusion
In this blog on git tutorial ,we will be having a proper understanding of most of the git commands,insllation of git bash tool, creation of different branches in git remote repository all of which play important role in proper functioning of the git tool. Remember to practise, stay updated with the latest trends in Automation Software Testing Course,and maintain a positive attitude throughout your interview process.As a result it has become necessary for developers and testers to have a proper knowledge on the usage of git commands as well as all other concepts associated with git.
Also, read my blogs on:
Popular Courses


Upskill Yourself
Consult Us
Consult Us