


Authentication in Rest Assured
Authentication plays a crucial role in Rest Assured when engaging with APIs that need user authentication prior to resource access. Rest Assured offers multiple ways to manage various authentication types.
There are different types of authentication. We are going to discuss five types of authentication that we are using nowadays.
1) Basic authentication- The user will send his user ID and password to the server, which will validate whether the user is legitimate. The user ID and password are encrypted into the format and then sent to the server. The type of algorithm we use is called base-64 encoding. It can be decoded easily, so we don’t prefer basic authentication. For public information, we use basic authentication like employee ID and employee name. There are two types of basic authentication
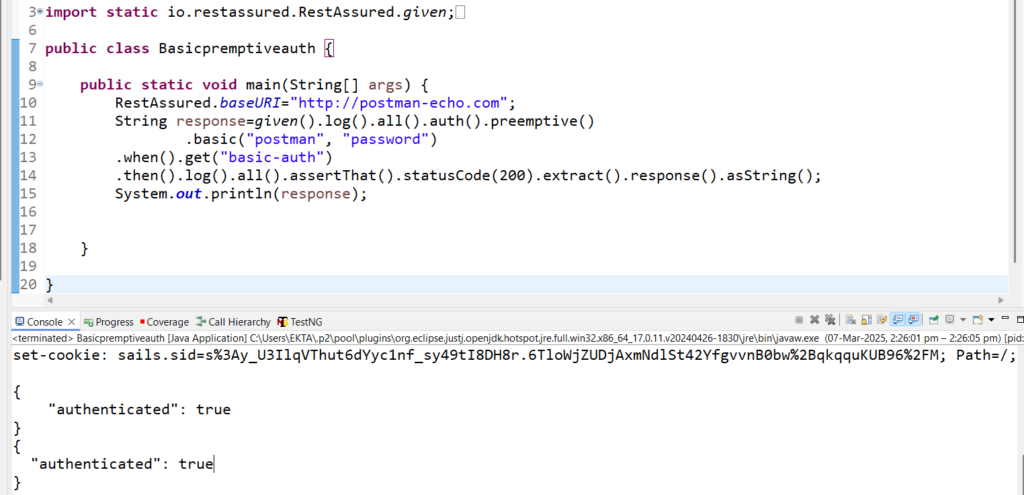
a) Premptive basic authentication– The user ID and the password are sent to the server even if it is not asked by the server. In the below code, we need to add preemptive().
Code Snippet:
					RestAssured.baseURI="http://postman-echo.com";
String response=given().log().all().auth().preemptive().basic("postman", "password").when().get("basic-auth").then().log().all().assertThat().statusCode(200).extract().response().asString();
System.out.println(response);
Output:
{
   "authenticated": true
}
{
 "authenticated": true
}
Screenshot:
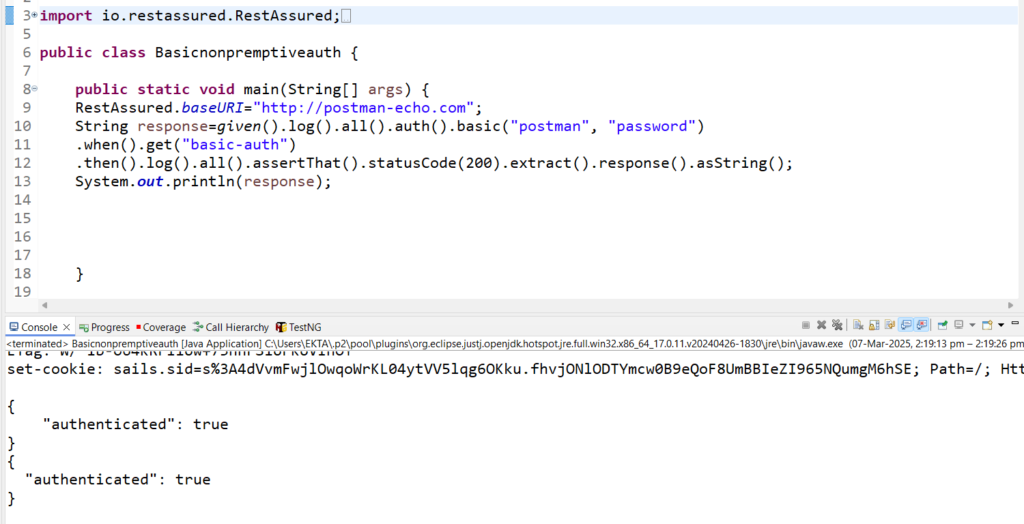
b) Non-Premptive basic authentication– The user ID and the password are sent to the server only when it is asked by the server. In RestAssured, by default, basic authentication is Non-Premptive. In the below code, there is no need to add preemptive().
Code Snippet:
					RestAssured.baseURI="http://postman-echo.com";
String response=given().log().all().auth().basic("postman", "password").when().get("basic-auth").then().log().all().assertThat().statusCode(200).extract().response().asString();
System.out.println(response);


Output:
{
   "authenticated": true
}
{
 "authenticated": true
}
Screenshot:
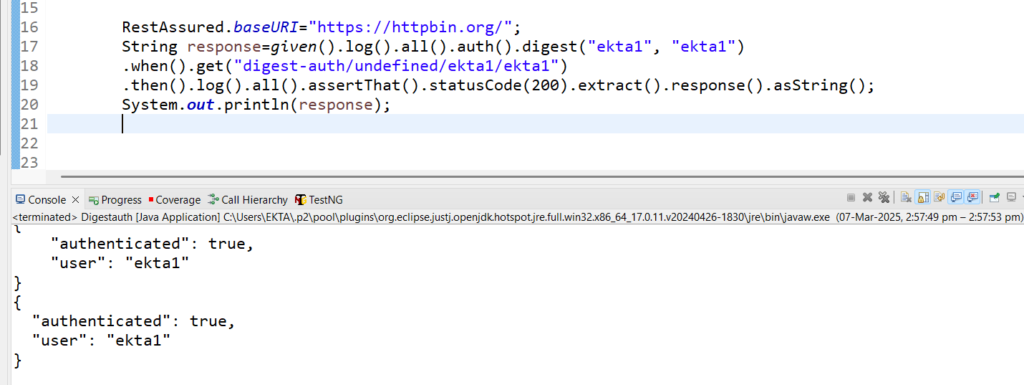
2) Digest authentication- The encoding algorithm used is complex(MD-5, SHA-256). We can send the user ID and the password directly to the URL depending on the way API is developed, and decrypting between client and server is impossible. It is used generally in applications where a user ID and password are required
Code Snippet:
					RestAssured.baseURI="https://httpbin.org/";
String response=given().log().all().auth().digest("ekta1", "ekta1").when().get("digest-auth/undefined/ekta1/ekta1").then().log().all().assertThat().statusCode(200).extract().response().asString();
System.out.println(response);

Output:
{
   "authenticated": true,
   "user": "ekta1"
}
{
 "authenticated": true,
 "user": "ekta1"}
Screenshot:
Difference between Basic authentication and Digest authentication
| Basic Authentication | Digest Authentication |
| The encoding algorithm is weak. | The encoding algorithm used is complex, and decrypting between client and server is impossible. |
Code Snippet:
					public static Map addusercredentilas()
{
	Map<String,String> mp=new LinkedHashMap<String,String>();
	mp.put("name", "John Dsouza");
	mp.put("gender", "male");
	 email="John" +Math.random()+"Dsouza"+"@gmail.com";
	mp.put("email", email);
	mp.put("status", "active");
	return mp;


}
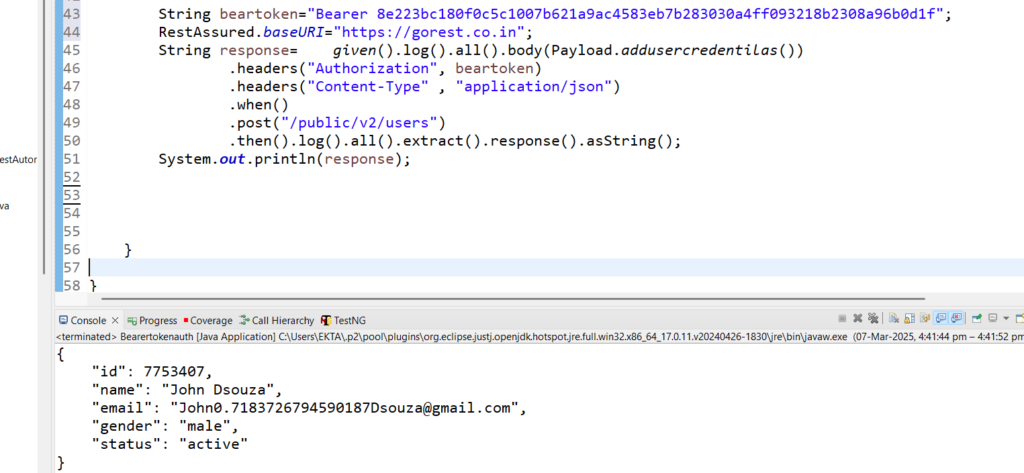
Code Snippet:
					String beartoken="Bearer 8e223bc180f0c5c1007b621a9ac4583eb7b283030a4ff093218b2308a96b0d1f";
RestAssured.baseURI="https://gorest.co.in";
String response=	given().log().all().body(Payload.addusercredentilas())
				.headers("Authorization", beartoken)
				.headers("Content-Type" , "application/json")
				.when()
				.post("/public/v2/users")
				.then().log().all().extract().response().asString();
		System.out.println(response);


Output:
{
   "id": 7753407,
   "name": "John Dsouza",
   "email": "John0.7183726794590187Dsouza@gmail.com",
   "gender": "male",
   "status": "active"
}


Output generates random email id:
{
   "id": 7753430,
   "name": "John Dsouza",
   "email": "John0.18861288014290578Dsouza@gmail.com",
   "gender": "male",
   "status": "active"
}
Screenshot:
4) API Key Authentication- Certain applications have exposed their API when we create accounts in these websites automatically API key is generated for that user. An API Key is an alphanumeric value generated by the server. The token that we will pass will be in the form of a query parameter. The Time To Leave(TTL) of this token is a week.
Code Snippet:
					RestAssured.baseURI="https://api.openweathermap.org";
String Response= given().log().all().queryParam("q", "Delhi")
				.queryParam("appid", "4c834f2c753226cb4953a66effe44611")
				.when().get("data/2.5/weather")
				.then().log().all().assertThat().statusCode(200)
				.extract().response().asString();
		System.out.println(Response);


Output:
{
   "coord": {
       "lon": 77.2167,
       "lat": 28.6667
   },
   "weather": [
       {
           "id": 721,
           "main": "Haze",
           "description": "haze",
           "icon": "50d"
       }
   ],
   "base": "stations",
   "main": {
       "temp": 303.2,
       "feels_like": 301.81,
       "temp_min": 303.2,
       "temp_max": 303.2,
       "pressure": 1016,
       "humidity": 28,
       "sea_level": 1016,
       "grnd_level": 991
   },
   "visibility": 4000,
   "wind": {
       "speed": 4.63,
       "deg": 130,
       "gust": 9.77
   },
   "clouds": {
       "all": 20
   },
   "dt": 1741591193,
   "sys": {
       "type": 1,
       "id": 9165,
       "country": "IN",
       "sunrise": 1741568807,
       "sunset": 1741611380
   },
   "timezone": 19800,
   "id": 1273294,
   "name": "Delhi",
   "cod": 200
}
Screenshot:

Difference between Bearer Token authentication and API Key authentication
| Bearer Token Authentication | API Key Authentication |
| The Time To Leave(TTL) of this token is for hours. | The Time To Leave(TTL) of this token is a week |
| It is more secure as the length of the key is longer. | It is less secure as the length of the key is shorter. |
| The response time of bearer token is more. | The response time of an API Key token is less. |
5) Auth 2.0 Authentication- These days, in modern applications, we are using Auth 2.0. As it is a 2-way authentication, we name it 2.0and it is also called service chaining.
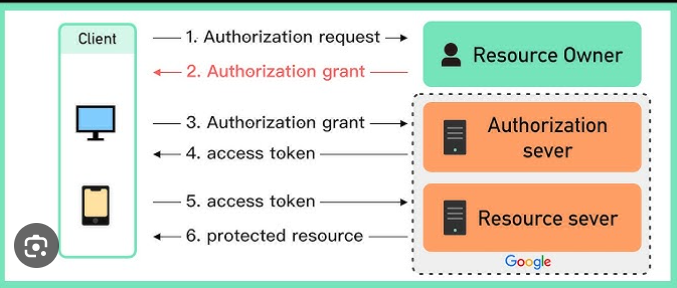
Workflow of Auth2.0-In the above diagram, the client is Bookmyshow.
Step 1-Bookmyshow is asking us to login to the application. Bookmyshow asked for an authorization request, which means the user wants to log in through email, Facebook, or Linked In. As soon as the user receives the authorization request, the user will give an authorization grant to bookmyshow. You can use my email ID and password.
Step 2- As soon as BookMYshow gets an authorization grant, it will go to the authorization server of Google(which has a list of access tokens present in that). Google will also check if the account is legitimate. Then Google authorization server-
- First, validates whether the user ID and password are correct or not.
- Second, if it is correct, it will generate an access token and give it to bookmyshow.
Step 3- The access token will hit the Resource server of Google, giving a protected resource that bookmyshow will use to log in to the application.Important things that need to be mentioned in the code
- We will use TestNG.
- We will get an access token.
@Test(priority=1)
a) We will use Preemptive Basic Authentication as we need user ID and password we will call it as client username and client secretid and in param we will mention (grant_type, client_credentials”)
b) We will get response, then we will fetch an access token by JsonPath.
3) We will use the access token to get the protected resource again from the server, which will help the application to use it further.
@Test(priority=2)
.auth().oauth2(access_token)
Code Snippet:
					public class Oauth2Example {
	String access_token;
	@Test(priority=1)
	public void getAccessToken()
	{
String client_username="Af5-qFspSxMooMrtyQQZvmlQG_gX47dOxdSC7UWjaZCbj1H04rTZq6e68Yga0VEVfKeoXlcxTT6_XYmm";
String client_secretid="EDXzzBqRf0lhrv9JJmtTFUGeWKHZJ6kkogmwnkevswX84gylpo4W51chh7WVYlQDu5W04FS51Xh_nCU8";
		RestAssured.baseURI="https://api-m.sandbox.paypal.com";
		String response=given().log().all().auth().preemptive()
				.basic(client_username,client_secretid).param("grant_type","client_credentials")
				.when().post("v1/oauth2/token")

		.then().log().all().extract().response().asString();
		System.out.println(response);

		JsonPath js= new JsonPath(response);
		access_token=js.getString("access_token");
		System.out.println("***********");
		System.out.println(access_token);
		System.out.println("***********");
	}


	@Test(priority=2)
	public void getProtectedResource()
	{
		RestAssured.baseURI="https://api-m.sandbox.paypal.com";
	String response2=	given().log().all()
		.queryParam("page", 3)
		.queryParam("page_size", 4)
		.queryParam("total_count_requiredpage", "true")
		.auth().oauth2(access_token)
		.when().get("/v1/invoicing/invoices")
		.then().log().all().extract().response().asString();
	System.out.println(response2);


	}

}
Output:
{
   "invoices": [

   ],
   "links": [
       {
           "rel": "self",
           "href": "https://api.sandbox.paypal.com/v1/invoicing/invoices?page=3&page_size=4&total_count_required=false",
           "method": "GET"
       },
       {
           "rel": "prev",
           "href": "https://api.sandbox.paypal.com/v1/invoicing/invoices?page=2&page_size=4&total_count_required=false",
           "method": "GET"
       }
   ]
}
Conclusion:
Rest Assured makes secure REST API testing easier by streamlining authentication. Bearer Token, OAuth 1.0, OAuth 2.0, Digest, and Basic authentication methods are all supported. By following this tutorial and gaining hands-on experience, you are equipping yourself with valuable knowledge that can propel your career in Software Testing Cucumber to new heights. It provides easy access to protected APIs with built-in functions like.auth().basic(),.auth().oauth2(), and others, guaranteeing effective and safe API testing.
Also Read:
Popular Courses


Upskill Yourself
Consult Us
Consult Us